 Gadgetorium
 Bubble Watch
Created: 2017-01-29, Last Update: 2020-10-07
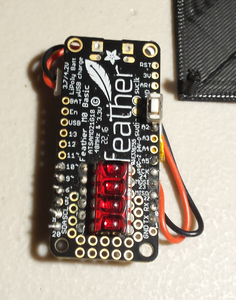
Digital wristwatch using a vintage HP bubble LED display and an Adafruit Feather M0. Includes a 3D-printed case that fits common watch bands.
 2020 Update
Having experimented with some different kinds of PLA and construction methods on other projects, I was inspired to redesign the case.
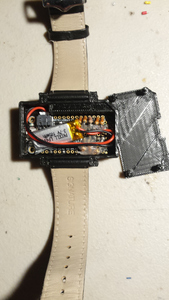
The 2019 design used bolts screwed into the PLA, which didn't hold up very long. The new design has the whole thing bolted through on both sides, using standoffs. The bottom and sides are one piece. The bolts on the bottom hold F/F standoffs. The board is held into those standoffs by F/M standoffs. The faceplate is bolted onto those.
I expanded the case to have the same space on both sides of the PCB, to give the band some more slack. The PCB is more recessed now, which shades and protects the display a bit, and makes room to have 3D-printed plastic plungers over the buttons. Since the sides are printed right-side-up now, I was able to make the watch band lugs lower-profile.
 2019 Update
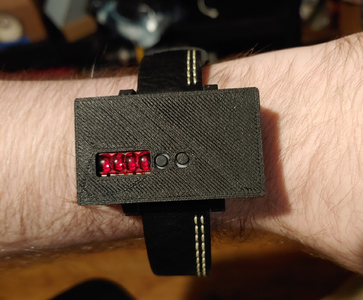
I added an extra button, a new band (the old one was wearing out) and tweaked the case design.

 Operation
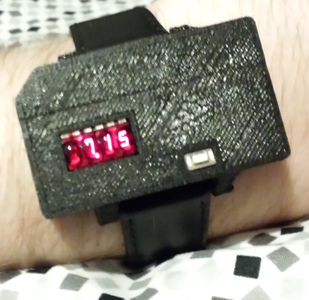
(Sorry, my phone doesn't handle glowy things very well.)
The watch sleeps until you push the button. It then cycles through the time, day, and date, then shuts off again. The battery lasts about 3-4 days between recharges. The time is set over the USB serial connection. Send the time as a UTC Unix timestamp, such as with the command `date +%s`.
The frimware is set for US Eastern Standard Time, and automatically adjusts to Daylight Savings for that timezone. To change the timezone, find this block:
//offset from utc in hours, change as appropriate for your local timezone.
#define norm_off -5
#define dst_off -4
Replace the number next to NORM_OFF with the UTC offset for your timezone, and the one next DST_OFF with the offset plus one. For timezones that don't observe DST, or use different rules, more changes may be necessary.
 Parts
Parts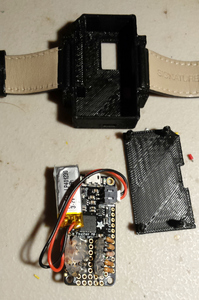
The resistors are connected in-line with the segment pins of the display. The battery just connects to the JST socket on the board if you're using an Adafruit battery. To fit everything in the prototyping area took very careful soldering, and to solder the parts in a particular order. I don't remeber what that order was, so good luck!
 3D Printing
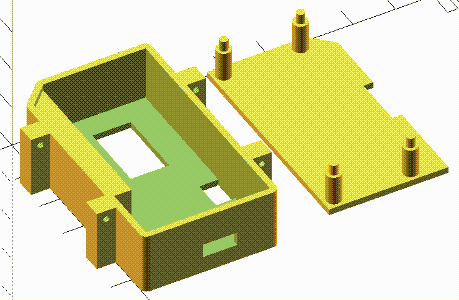
The model is saved in OpenSCAD format, and is in units of millimeters. It should print without supports, and fits on a 100mmx100mm bed. Mine was printed in black PLA on a PrintrBot Simple Maker Edition. The circuit board should press fit into the front of the case. The back then presses into the front part and the pcb mounting holes.
 More Photos

© 2026 Kyle Delaney | Site Map