 Gadgetorium
 Raygun
Created: 2025-04-09
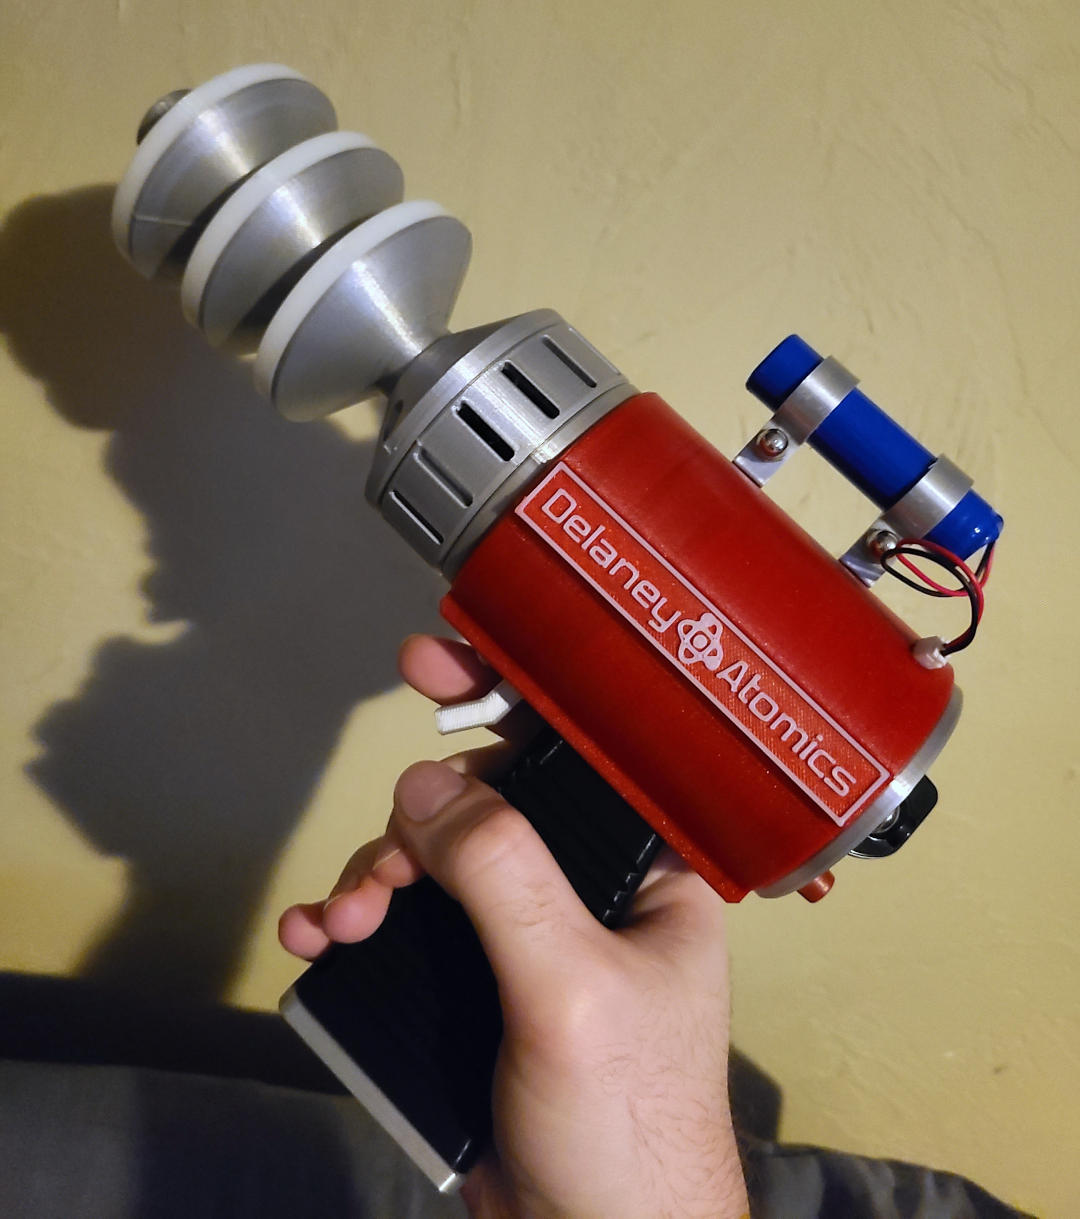
A prop raygun with lights and sound. It has multiple settings, and charges over USB-C.
 Settings
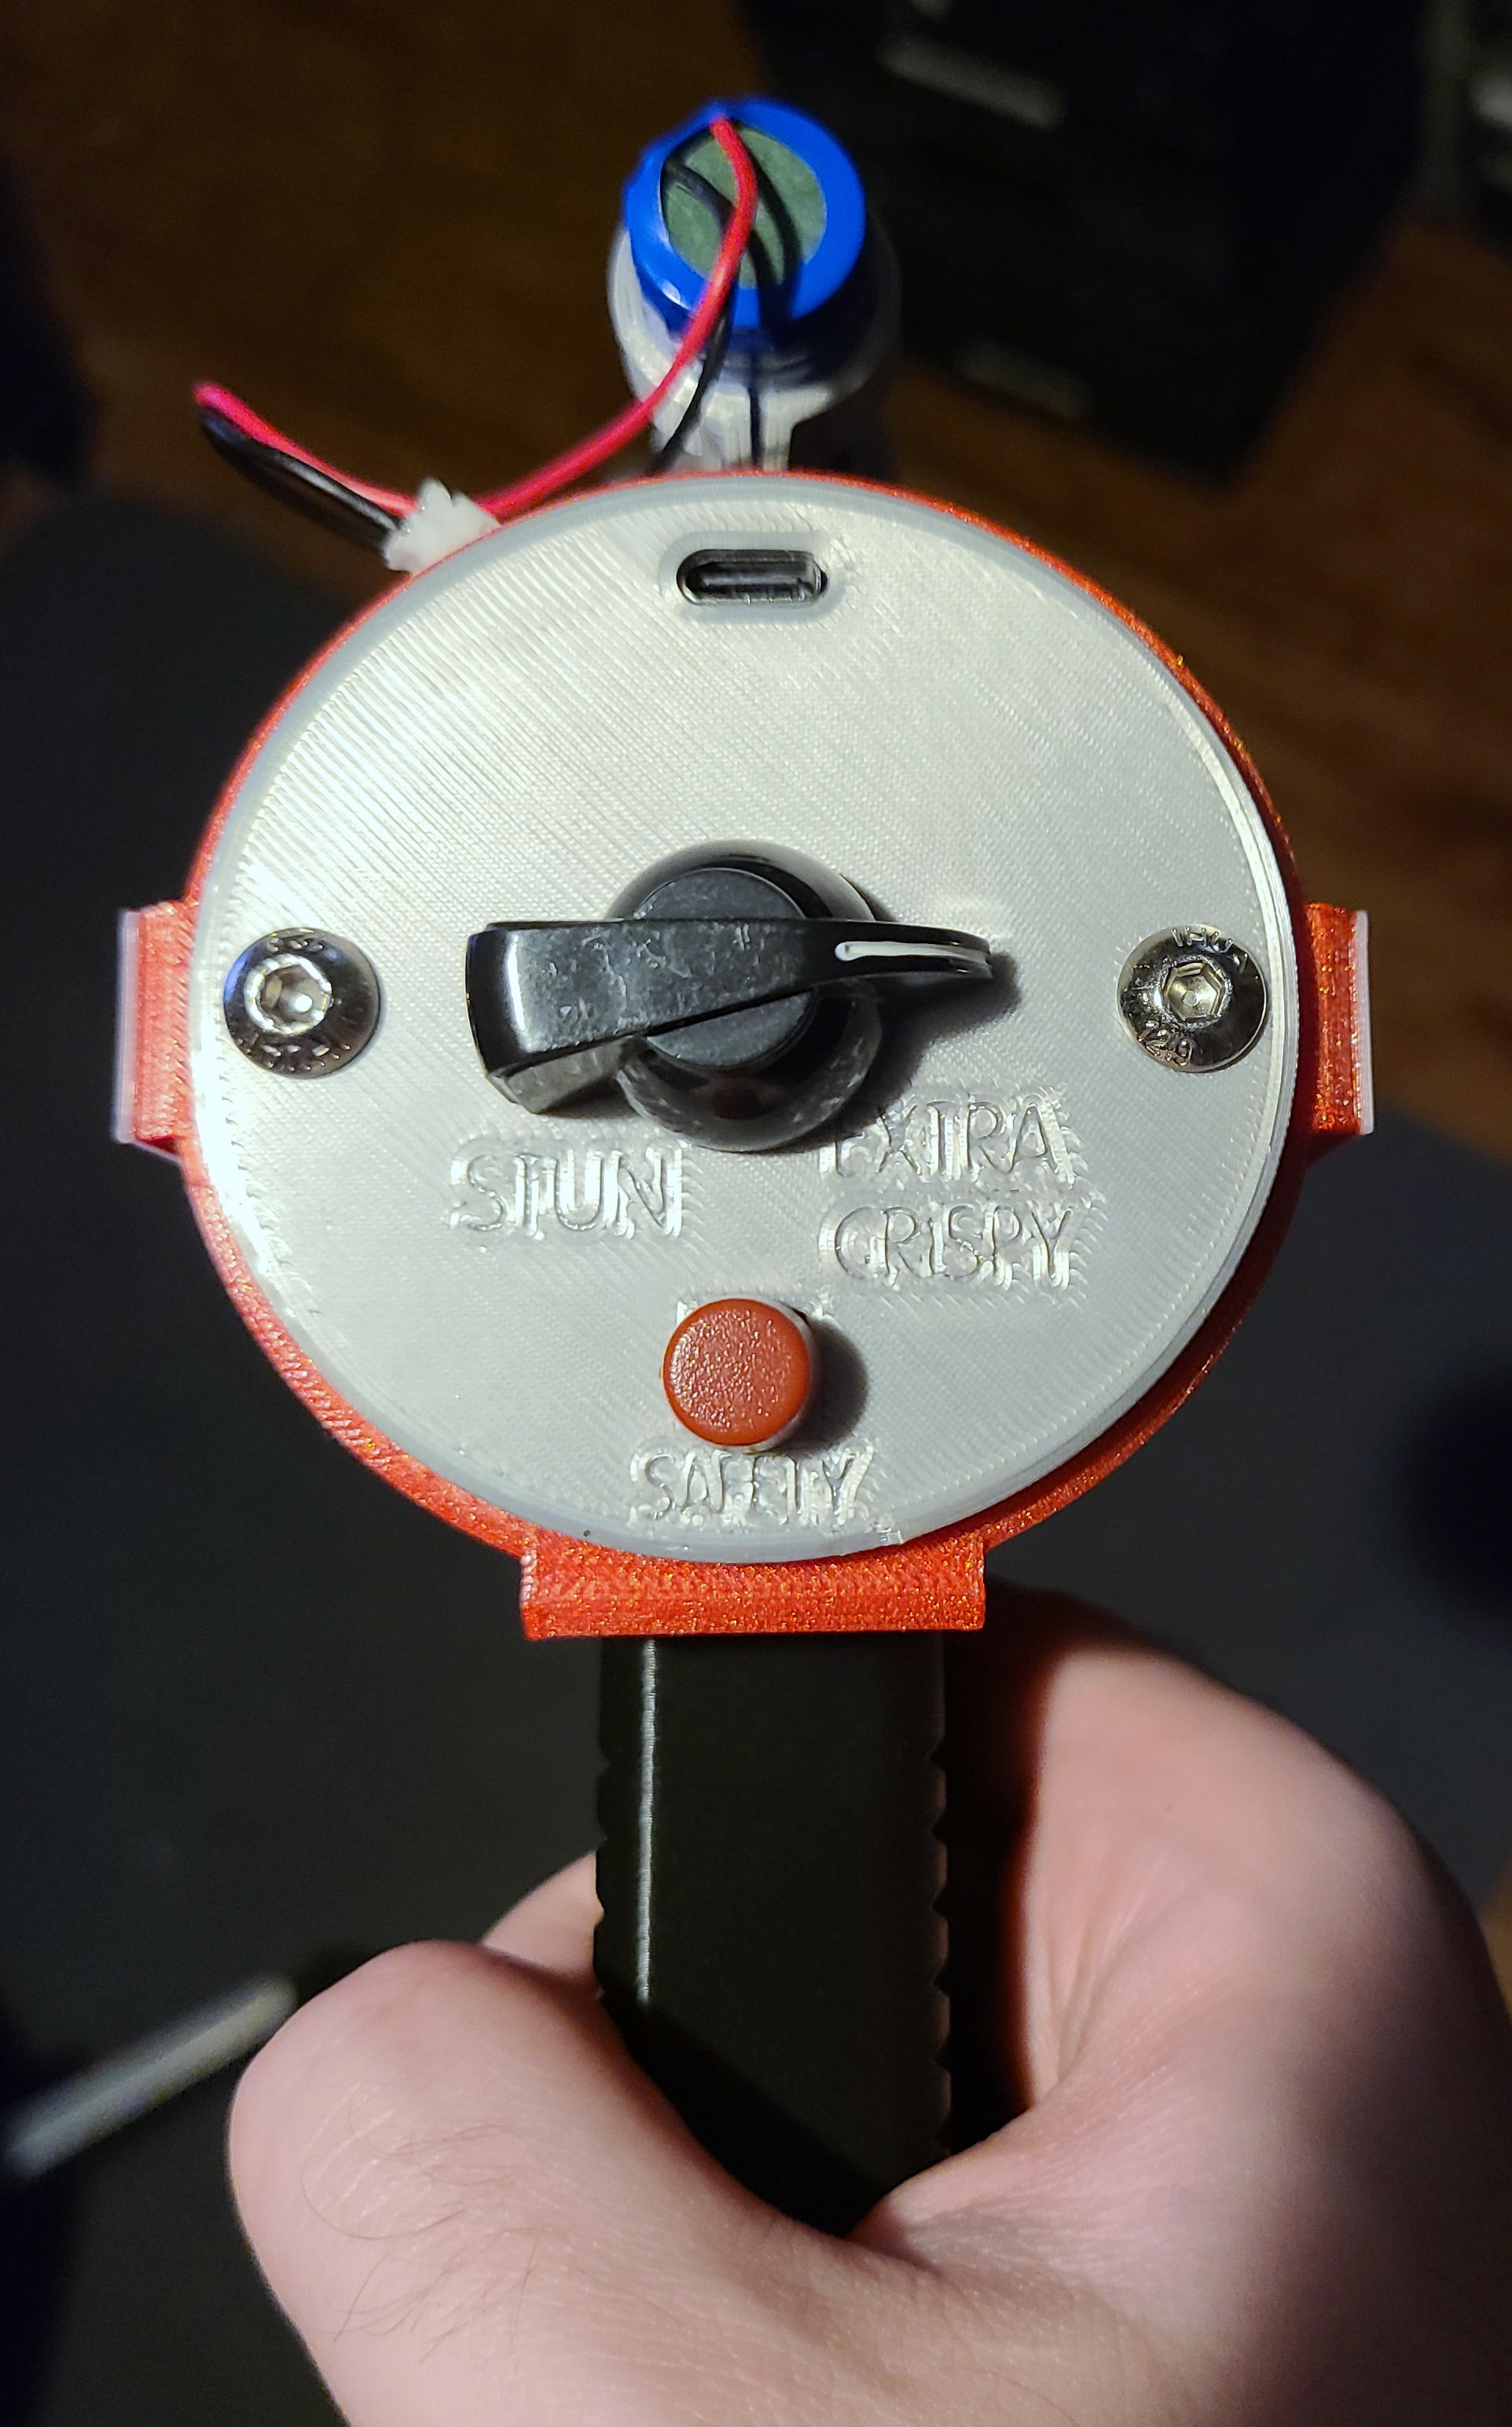
As the setting turns from stun to "Extra Crispy", the idle sound gets louder, the animation speeds up, and the color goes from red to cyan. The shots blends between increasingly intense sounds. After each shot, the idle animation ramps back up from the lowest setting to the current setting.
ConstructionThe heart of raygun is an Adafruit Propmaker RP2040 Feather board. In addition to the microcontroller it includes the battery charger, audio amplifier, and Neopixel driver. Three Neopixel rings in the barrel provide the lighting. A small speaker behind the barrel provides the sound.
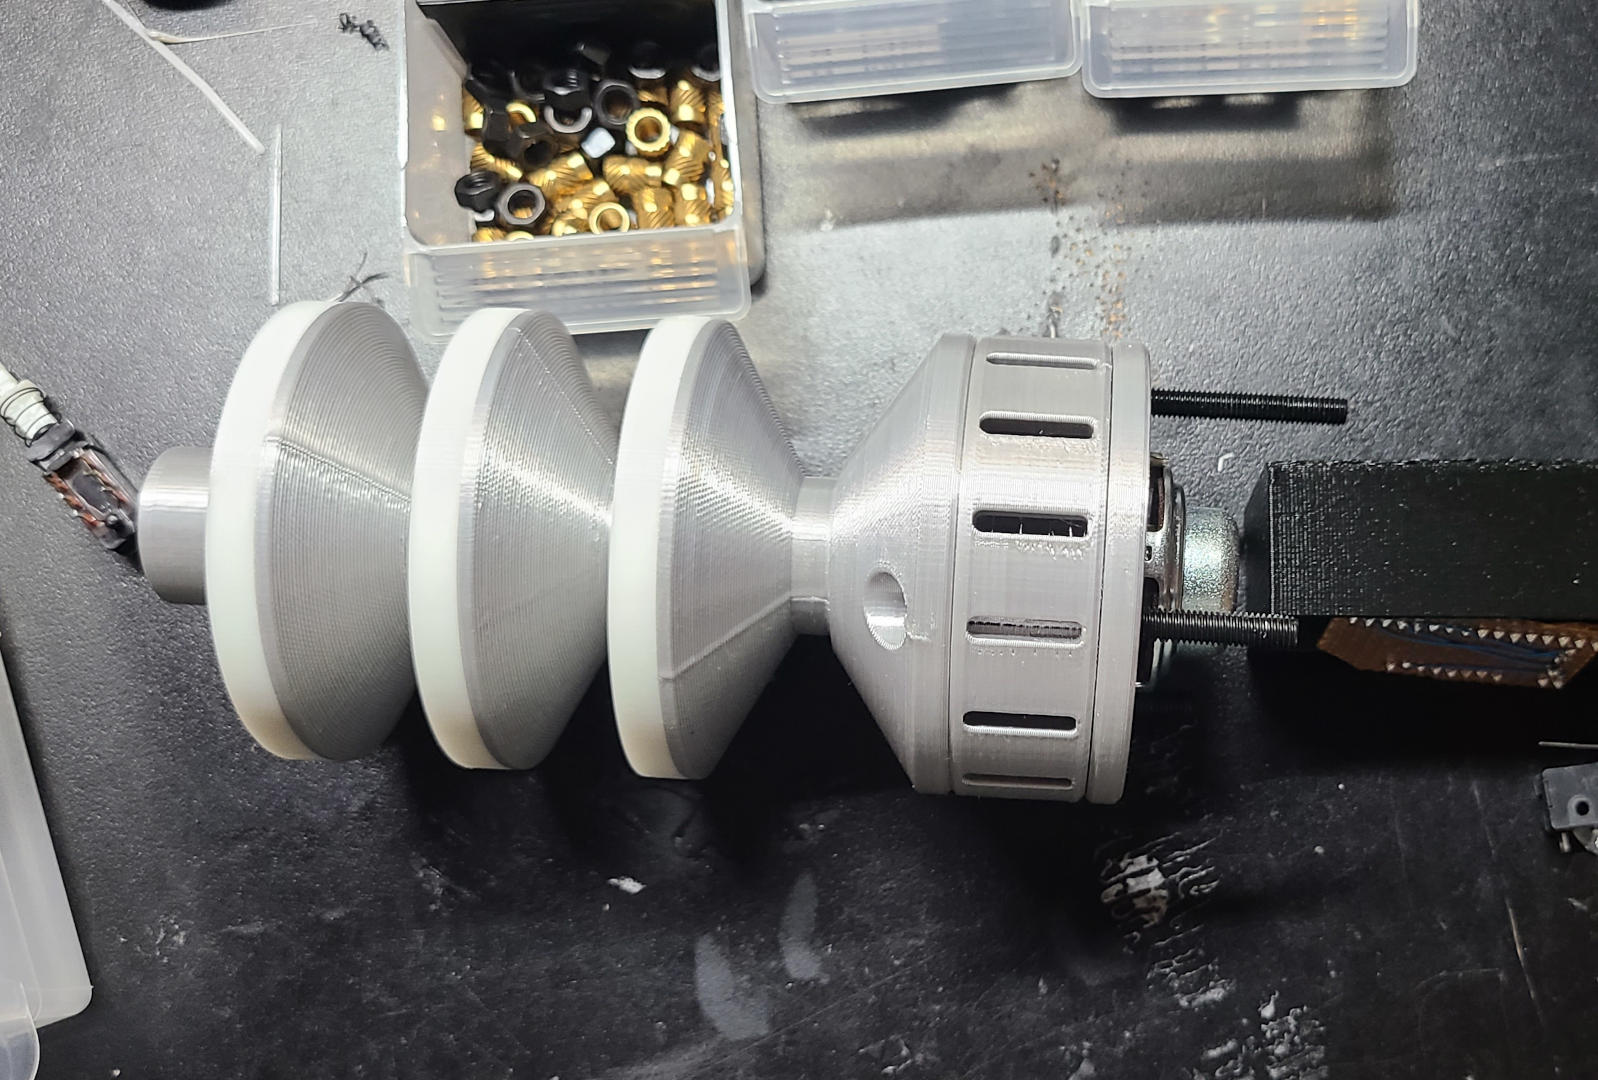
It took nearly a year to finish the CAD, as it is a very difficult shape make practical for assembly. I didn't use any glue, and I tried to limit the amount of exposed screws, which made things more difficult. The barrel was the first part to be completed. The barrel is constructed of segments that are held together by a threaded rod. There is a threaded insert inside the end of the barrel, and a nut holds the other end. Each disk contains a Neopixel ring. Behind the base of the barrel is a grill section for the speaker. The barrel base, grill, and speaker mount are held together by three screws that attach the assembly into the body.
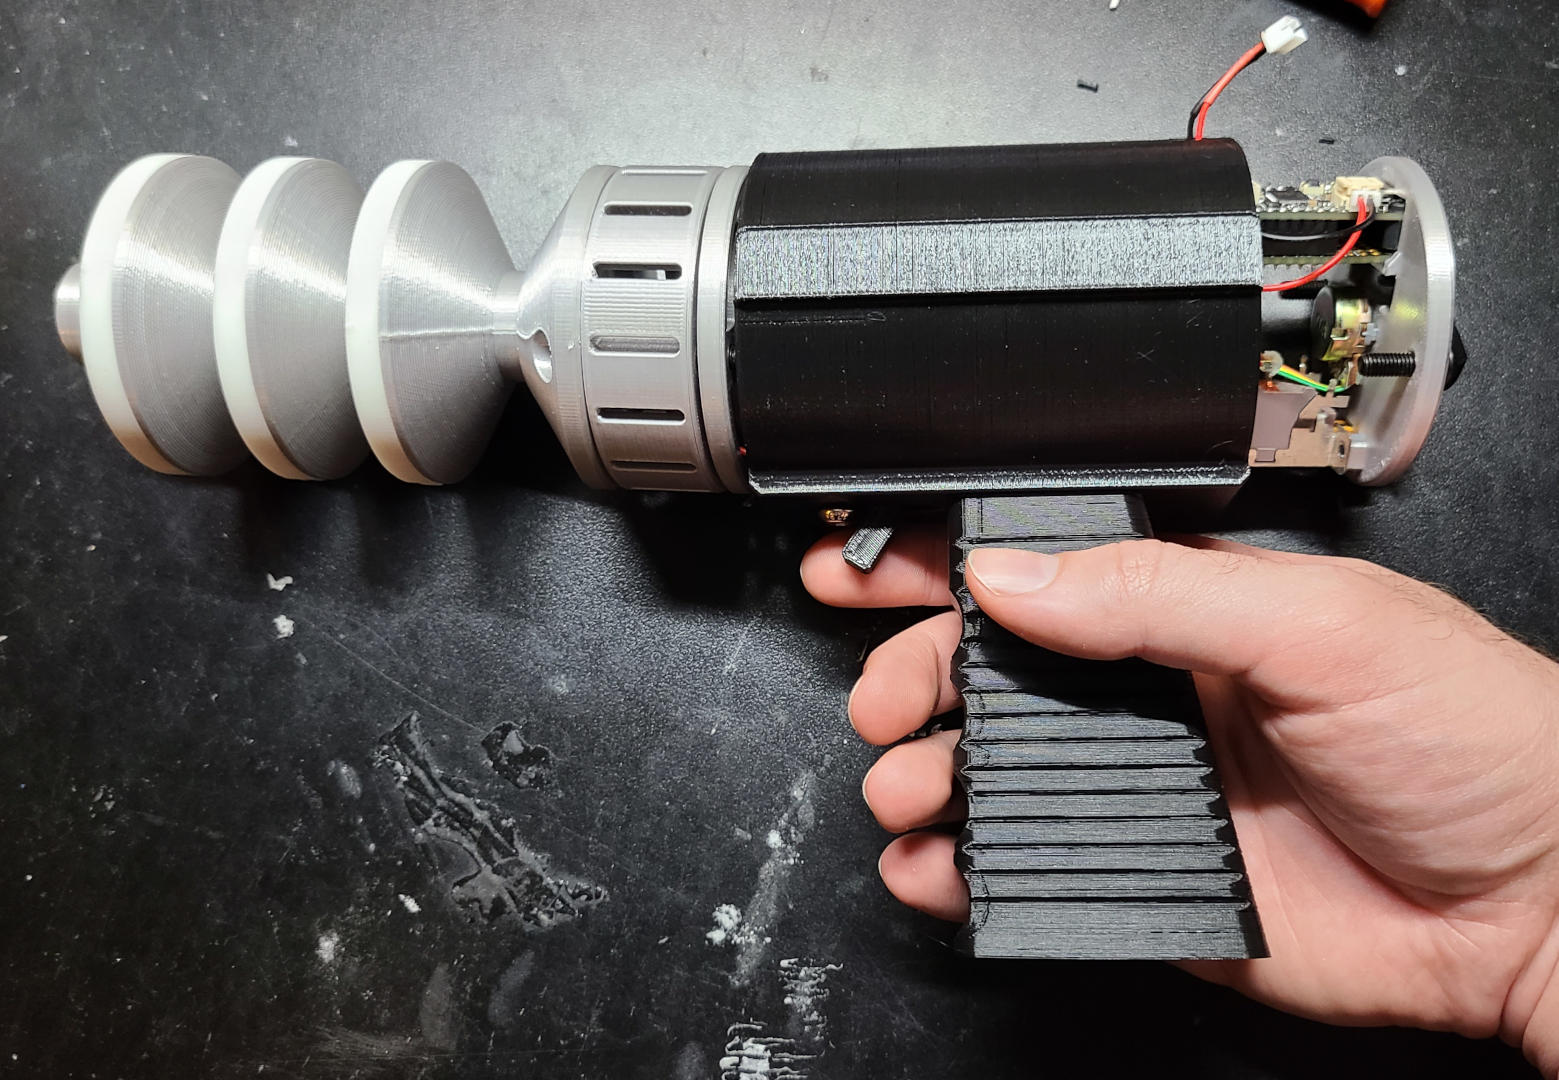
The body design I eventually settled on is a hollow tube. The barrel/speaker assembly and the back panel both screw into threaded inserts in the body. The electronics are all mounted to the back panel. The PCB is screwed in sideways so that the USB port is flush to the panel. The potentiometer and dial are parts from Sparkfun that I've had for many years. The "safety" switch is the power button from an old Yamaha keyboard that broke. The trigger is it's own 3d-printed assembly that mounts in a slot in the body. Screws go into hollows in the bottom of the grip and are secured with nuts, which also hold half of the trigger assembly. A bottom trim piece friction fits over the hollows. (Not pictured here, it's the silver part in the image at the top of the page.) One regrettable exposed screw holds the front of the trigger assembly.

© 2026 Kyle Delaney | Site Map